|
One of the things I do is scavenge sites like ebay for laser parts, trying to find components for building a laser from scratch. Complete lasers are of course very nice to work with but a homebuild one is a much more fun challenge. High power lasers hardly make it to ebay, if they do they're usually priced accordingly. Interestingly enough laser component find their way easier and much cheaper. |

|
|
|
Designing the crystal mount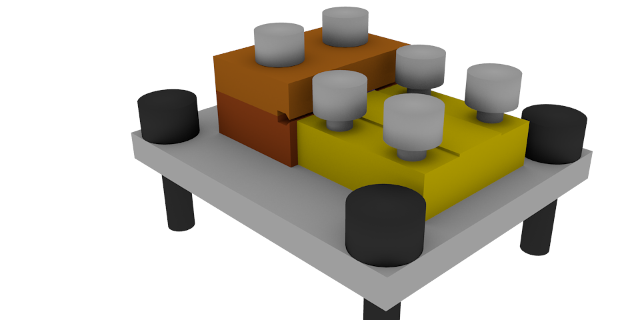
The whole assembly designed in BlenderDesigning a sidepumped laser is probably more involved that just putting the diode bar next to the YAG rod but I didn't do much more than that. I didn't want to create a hotspot by putting the diode bar emitter array very close to the YAG rod so I kept a 0.8 mm gap between the emitters and the YAG rod. The idea was to enclose the emitters and the YAG rod in a reflective cavity so that I wouldn't unnecessarily waste pump photons, that's why I milled a triangular snout in the heatsink with at the end the diode bar emitters. The snout should easily capture most of the vertical divergence of the emitters and reflect the rest. My estimate is that the bulk of the power hits the crystal direct on and creates a reasonable even illumination profile. Precise enough considering all the unknowns.
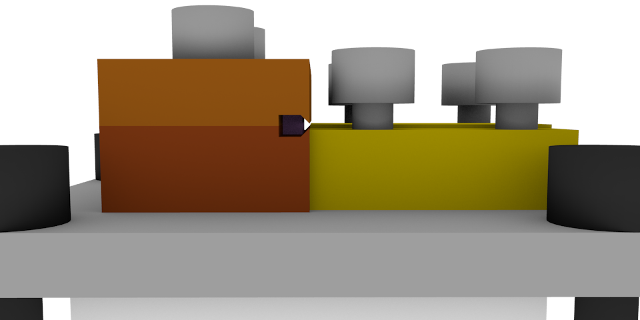
This side view shows the YAG rod in the pumping chamber with the snout on the rightUnderneath the aluminum base plate will be a TEC to keep the whole assembly cool. By using plastic bolts the whole assembly is isolated, allowing a positive power supply for the case positive diode bar. |
|
|
|
|
Building the laser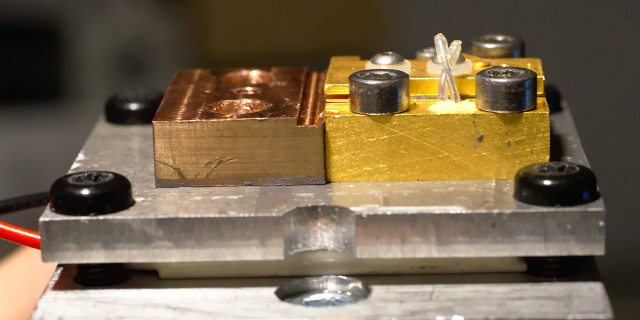
The assembly nearly complete, showing how the diode bar and the crystal holder sit next to eachotherThe copper heatsink was milled using my homebuild milling machine. I'm satisfied with the result, I now have a nice tapered heatsink made to the crystal dimensions. I left the heatsink wider than needed to protect the crystal faces a bit when testing in my not-so-dustfree lab.
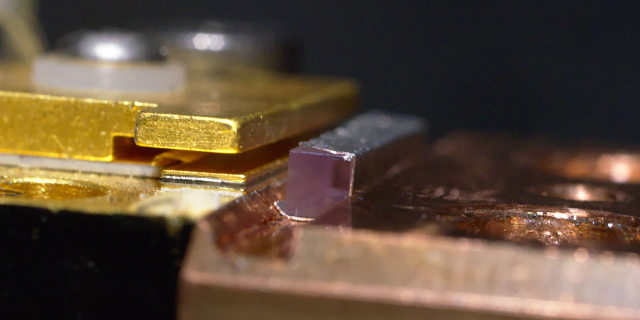
Showing how the YAG rod sits in the heatsinkI don't know if the unpolished side of the yag rod scatter strongly or are actually ment to diffuse the pump light, my guess and hope is the latter. An indium foil protects the YAG rod against the clamping of the heatsink and improves thermal contact. It may not reflect the pump light very well but I'll take that loss. |
|
|
|
|
Initial testing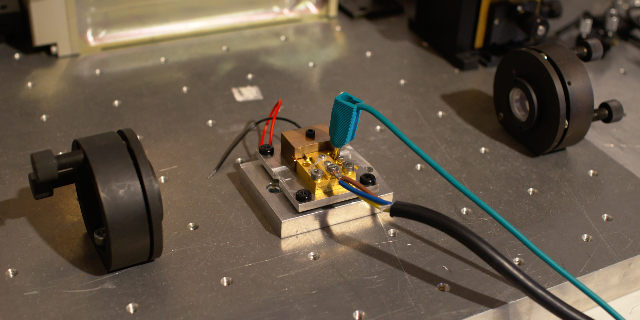
The completed laserI don't have the temperature controller I plan to build for this laser yet, which is a problem. The wavelength of the diode bar is very temperature sensitive and needs to be matched to the absorption of the Nd:YAG. Also running without any cooling means running the risk of overheating the whole thing. Nevertheless I decided to push my luck for this initial test.
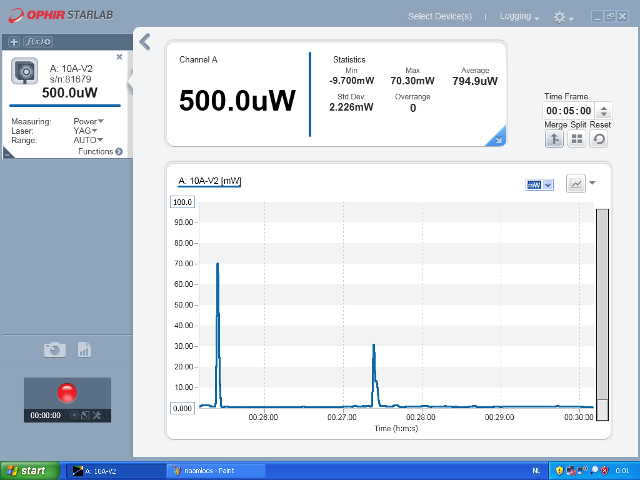
The first light measured out of my laserAnd succesfully. For a brief moment the power spiked to 70 mW with somewhere around 20A through the diode bar, a truly horrible efficiency. But with no temperature optimalisation, stabilisation or even cooling, no chance to align the cavity properly and plane mirrors. But it's output, it's a laser built from loose components that works. Optimalisation will follow, which is much easier when there's lasing to start with. |
|
|
|
|
Testing the Laser diode bar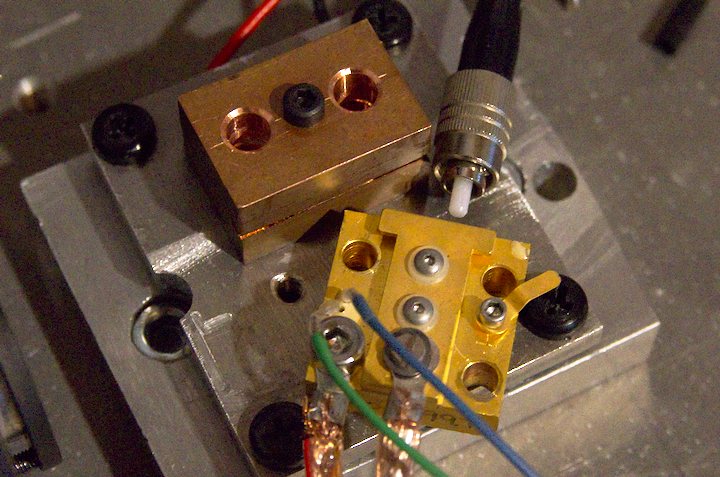
Measuring the spectrum of the laser diode barOne possible reason why the laser would not work properly is a malfunctioning laser diode bar. I checked the spectrum with an Optical Spectum Analyser (OSA). 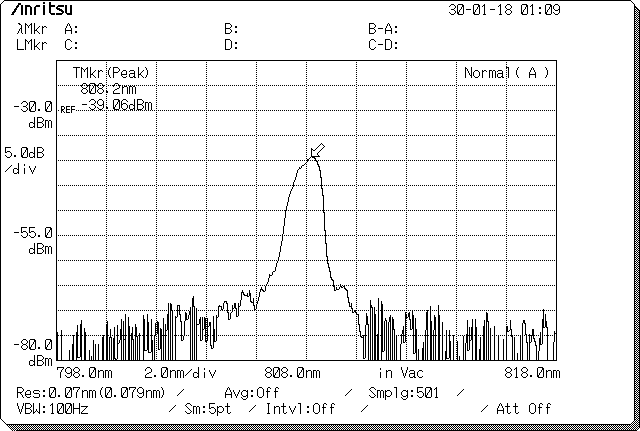
Spectrum of the laser diode barThe spectrum is centered properly around 808nm. This depends on the temperature of the laser diode bar. Even at the correct temperature for a 808nm center wavelength the laser did not work properly. The mirror set I use I got from ebay from China. Changing to mirrors I got from a UK seller not only did not work but it stopped any output alltogether. |
|
|