|
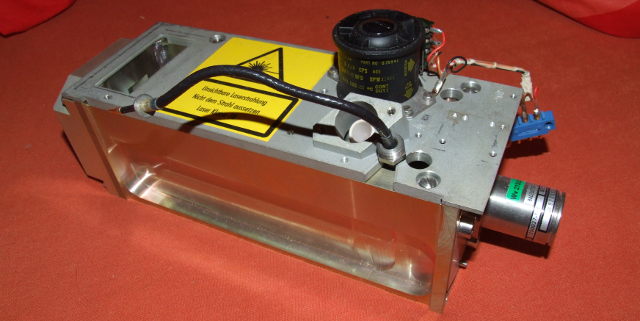
Always in the quest for the next exciting laser I found an old rangefinder on ebay.de. Made by Siemens and probably from an army vehicle. Figuring out the operation without manual is near impossible. The components however were nice enough, and an air cooled pulsed yag lasers shouldn't be too difficult to operate. It has a Q-switch too, that however is a bigger challenge as the driver is fully potted. The laser itself without electronics attachedThe laser case is machined from 1 solid block of aluminum. The black fan on top provides airflow for cooling the flashlamp and probably the YAG rod and elliptical reflector as well. 3 black rods run from the front of the case to the back, the HR alignment at the back is connected to those, probably to avoid thermal expansion of the casing to influence cavity alignment. Now the HR is closer to the OC expansion wise.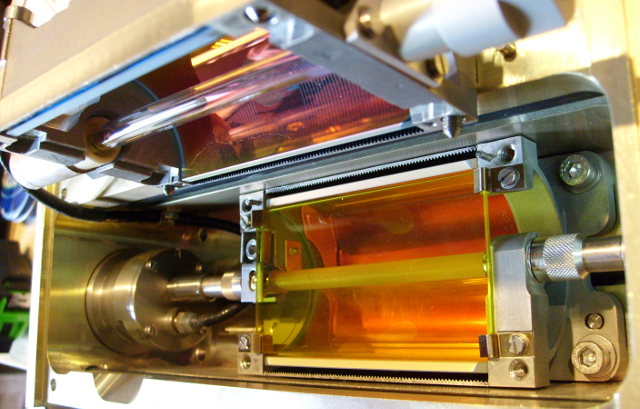
Inside the laser, the Nd:YAG rod and flashlamp visible inside both halves of the elliptical reflector. The Q-switch is to the left of the YAG rod, where the black cable goes into.The OC and Q-switch are in 1 solid assembly, only the HR can be aligned. Since the relative alignment of the 2 will be the most critical this will be enough. Interesting though that the Q-switch is not adjustable. It's most likely designed for military applications, alignment can drift under vibrations so minimizing movement and precision engineering can be better in this application than having an initially perfect alignment. |

|
|
|
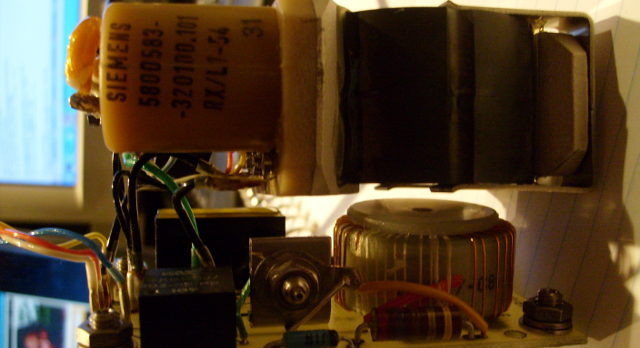
Trigger circuit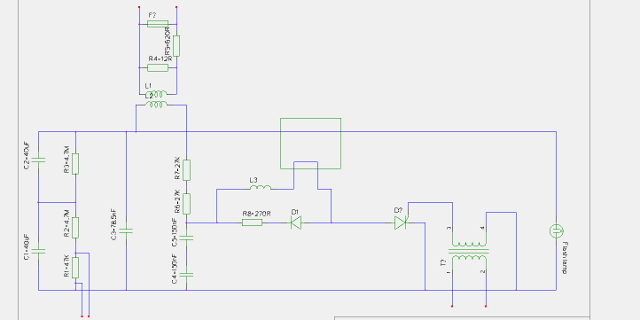
Circuit diagram of the trigger circuitThe PCB of the trigger circuit was accessible so I could figure out how it worked. Not all of it makes sense to me yet, but the transformers and SCR give enough of a hint to operate it. Applying a pulse from a pulse generator on the small isolating transformer triggers the SCR and fires the flashlamp. The big rectangular box is the main big trigger transformer that provides the voltage to fire the flashlamp. Actual view of the trigger circuit |
|
|
|
|
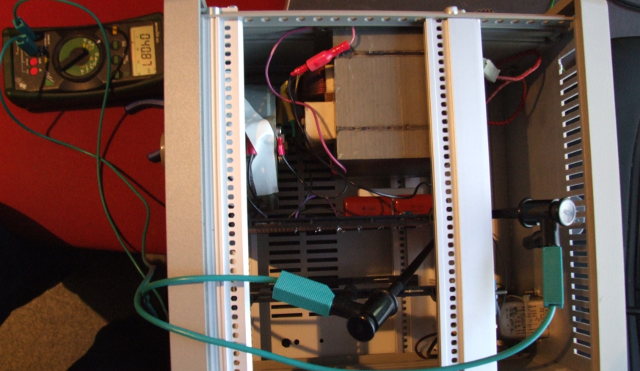
Capacitor chargerA capacitor charger was needed. I didn't have a proper high voltage power supply at the time, but I did have a microwave oven transformer that converts line voltage to around 3 kV, more than enough for what I need. Adding a variac, single rectifying diode and a charging resistor gave me a functioning power supply The insides of the power supplyVery crudely made and inconvenient, the charging levels slowly off instead of stopping at the correct voltage. A current limiting circuit is needed, but at 3 kV that is not completely trivial. For the initial testing it wasn't needed anyway. |
|
|
|
|
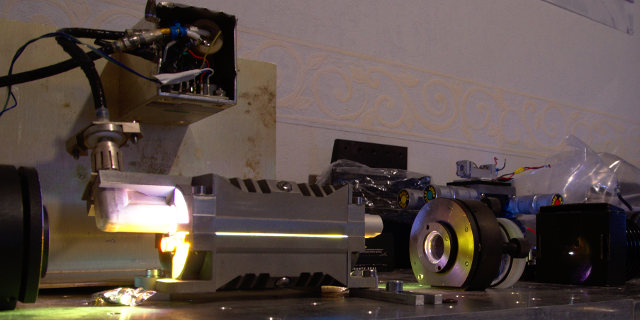
First light!Firing the flashlamp didn't result in a measurable output (mostly because I didn't have proper equipment for measuring pulses yet). Applying up to +/- 5 kV at the q-switch didn't change anything either. This means either the cavity is broken/misaligned or the threshold is not passed. Considering the caps were charged fully it should have worked. It probably did, at a very low efficiency due to the mirror reflectivity being optimised for q-switched operation. Which is why I took the flaslamp, elliptical reflector and Nd:YAG rod assembly out of the laser and placed it between 2 mirrors of my own. I have 2 planar mirrors, one HR and one 85% reflective. From left to right: HR, flashlamp/YAG rod, OC, lens, black paper with plume50mJ in long pulses aren't very powerful, but this counts as my first homebuild laser. Previous homebuild lasers were either diode lasers (fun but laser diodes are complete lasers in itself) or sticking a 808nm diode behind a composite crystal to make a doubled yag laser. Future work will be getting the q-switch back in, experimenting with different mirrors (reflectivity, curvature) and hopefully getting more energy into the flashlamp, it should be able to take at least 40J judging from it's dimensions. |
|
|
|
|
Just a bit betterUsing a different mirror set (1m RoC HR, 90% OC) I got 100mJ for 10J input, a 1% electrical to optical efficiency. Not terrible, but still improvements can be made. A higher flashlamp energy would be useful, the large flashlamp and crystal have a larger lasing threshold. 10J into the flashlamp is only very little, for a higher energy the efficiency will also be higher. But for that I need a different capacitor and inductor/trigger combination, an item for the todo list. |
|
|